Jonathan Davies Designs - Graphics - Tutorials
3D Studio MAX 2 Tutorials - Video Post (Glow)
Many people on the newsgroups ask questions about the glow filter and how to order the different items in the video post window. In this tutorial I will try to help people to get used to creating the glow effect and animating it.
1) Creating the object:
For this section I am going to explode a torus and add the glow effect. You can replace the torus with any object or even a particle system to create sparks. Firstly click Create | Geometry | Torus and drag a torus out to the size you want. Change the segments to 50 and the sides to 20, this produces enough segments to create a good glow. Next select Create | Space Warps | Bomb and place the bomb in the centre of the torus. You can place it anywhere you want and the torus will explode in the direction from the bomb to the object. Next select bind to space warp and drag a line connecting the bomb and the torus. If the scene was complicated you could select the torus, select bind to space warp then select 'select by name' and select the space warp from the list.
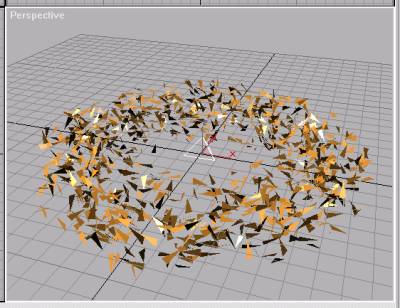
Next click on the space warp, select Modify and change gravity to 0 and chaos to 6, this will allow the torus to explode outward and add a bit of randomness. Click play and you should see the torus exploding. Frame 7 should look something like this:
2) Get the objects Glowing:
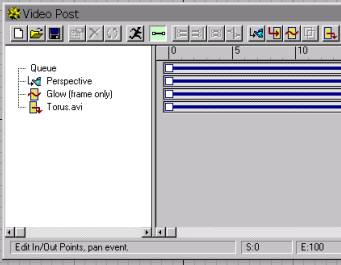
Next you need to set up the glow. Open the Material editor and select the first slot. Change the colour or texture of the material to what ever you want. I used a yellow diffuse colour and made the objects shiny. Select the Material effects channel to 5 and select apply after clicking on the torus. Next, open the video post window and select add scene event. Select perspective and set up the view as you want it. I used the default settings for this demonstration. Then click on 'OK' to take you back to the video post window and deselect the perspective view. Next click on 'Add image filter event' and select glow. Under the glow dialog box select material effects channel to 5 (Same as in the material editor) and select the size to 12. Click on 'OK'. Then deselect everything and select 'New image output event' and click on files and specify the output file (Torus.avi) then press 'OK'. The video post window should now look like the one below.
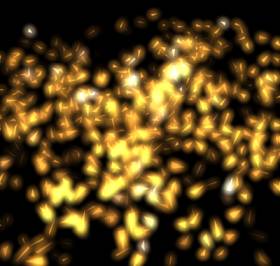
Now you are ready to render. On the video post window click the picture of the running man (Execute) and this will bring up the render dialog box. Specify the settings and render as normal. Below is frame 15 from the 100 frame animation.
You can download the scene for this tutorial below in the zip file below.
Torus Scene only (8kb)
This tutorial was written and produced by Jonathan Davies. No unauthorised copying of the tutorial to put on your page without my permission. You may use the scene as you wish.